Let’s face it: being an ecommerce business owner involves a lot of tedious administration time.
In 2014, Canon commissioned a research project to better understand how people work and the challenges business owners face day-to-day. They interviewed 1,047 workers from small, medium and large organisations across Australia, and found that 63% of people spend 2 – 10 hours of repetitive admin work per week.
This racks up to around $3,203 to $16,415 a year in wasted time!
From communicating with couriers to entering data, entering data, and entering MORE data… it seems a lot of time flows down the drain, leaving you with less time to focus on the more important things like customer service and overall business growth.
At Transdirect, we want to see your ecommerce business succeed, and that means eliminating unnecessary, repetitive administration time.
In the Transdirect Member’s Area, we’ve created the “Quick Book” function which allows you to save frequent addresses, parcel sizes, payment details, and account preferences, so you can book a parcel pick up in a matter of seconds!
Learn how to use our Quick Book function by watching the video tutorial below, or scroll through for in-depth instructions and images!
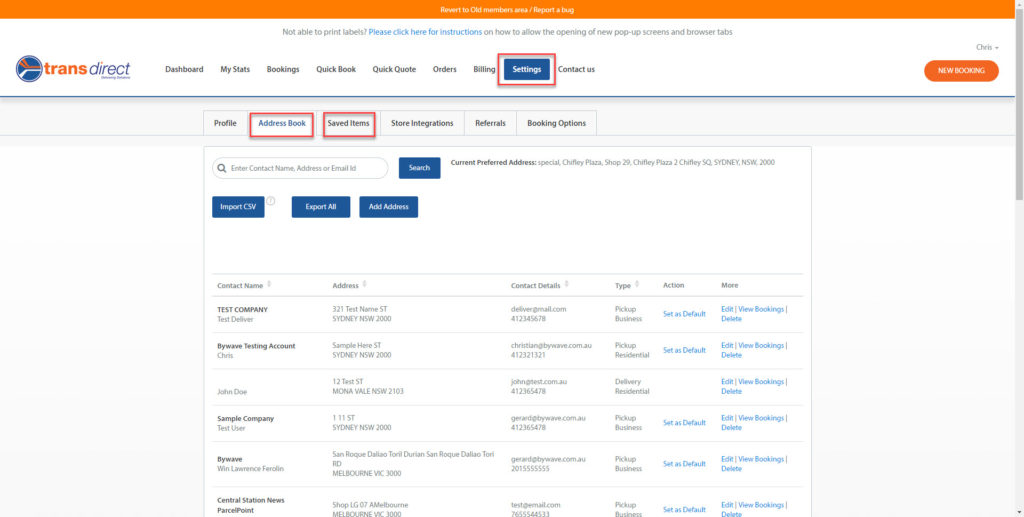
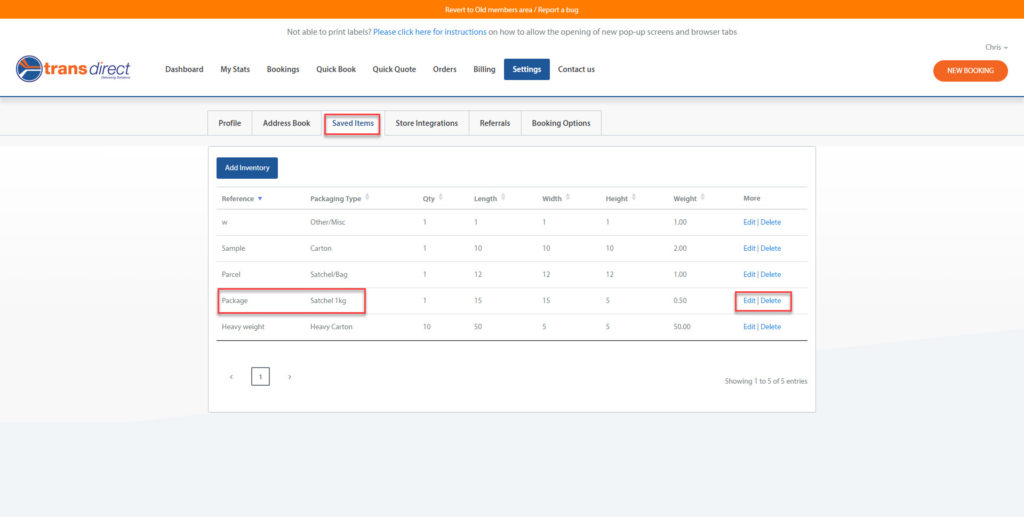
- You can save extra time when making a booking with Transdirect using the Quick Book function. You can save extra data by going to the “Address Book” and the “Saved Items” tab in “Settings”.
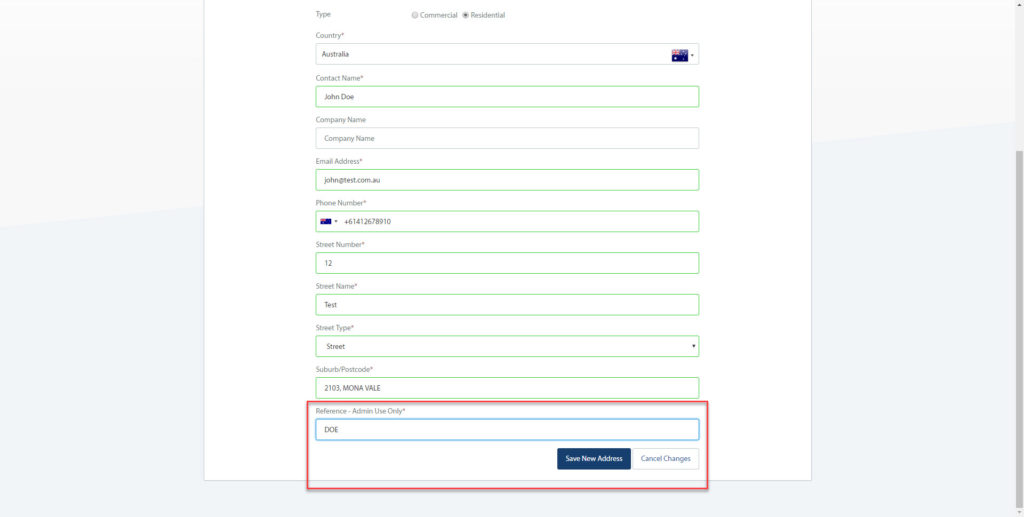
2. You can add an address and it will be saved in Quick Book so you can save extra time entering data. You can select “Pickup Address”, “Delivery Address” or “Both”.
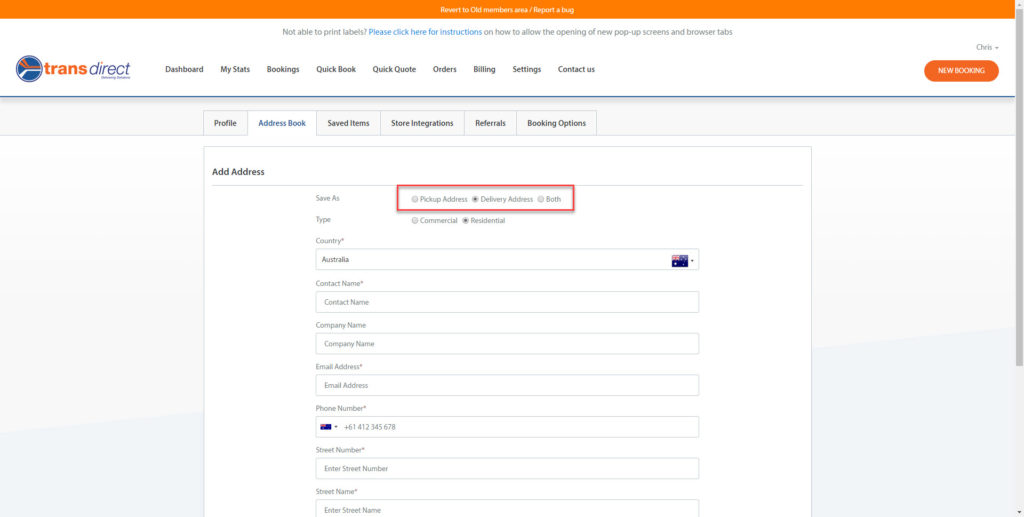
3. You will need to select the delivery type i.e. commercial vs. residential.

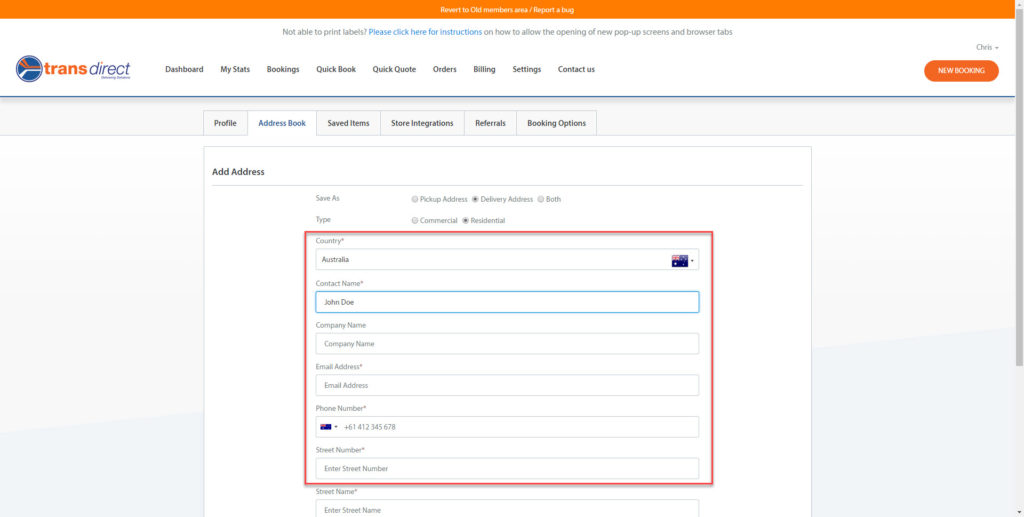
4. You will need to select a country and enter a contact name. If it’s a commercial job, you will need to enter in the business name. You will also require a phone number, email address, and address for delivery.
5. You will need a reference for the delivery, also, for administrative reasons.
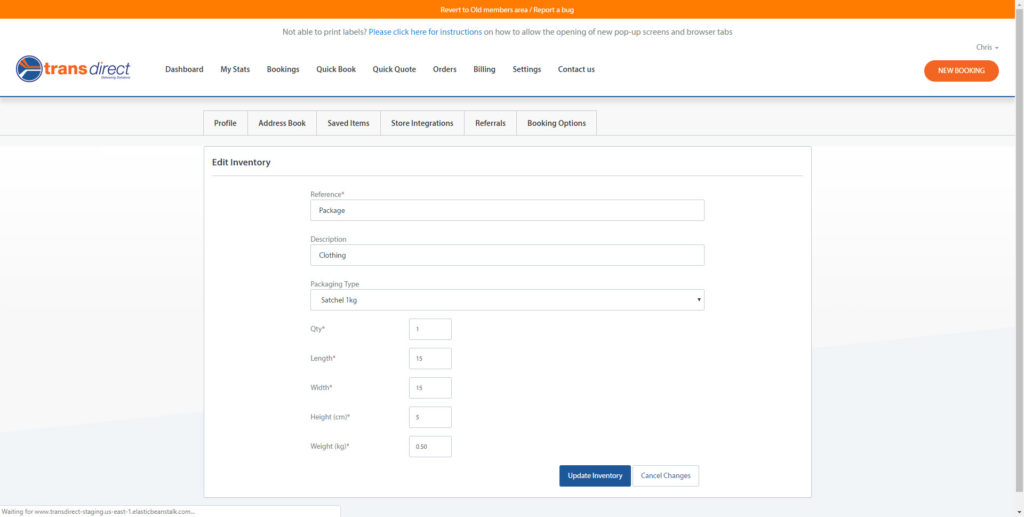
6. Before going to Quick Book, we recommend checking “Saved Items”.
7. Click “Update Inventory”.
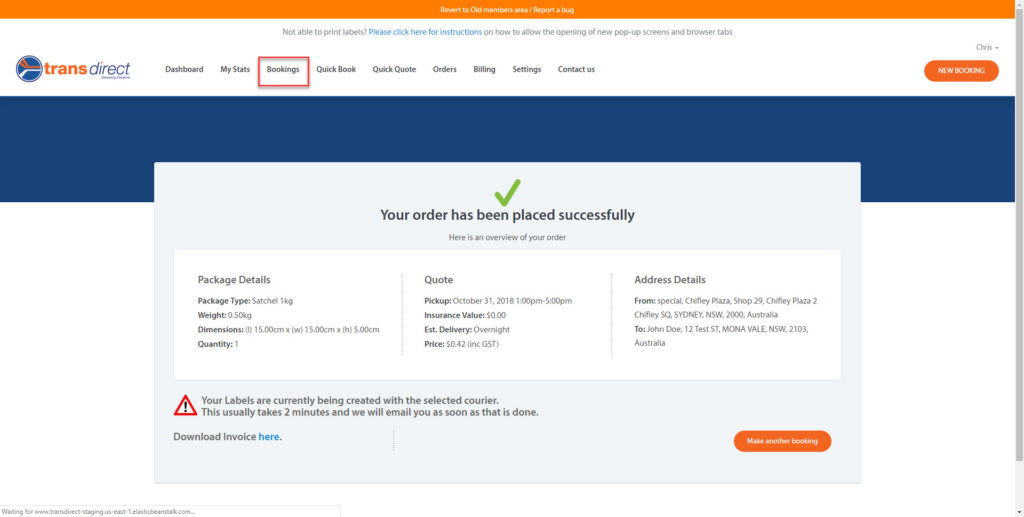
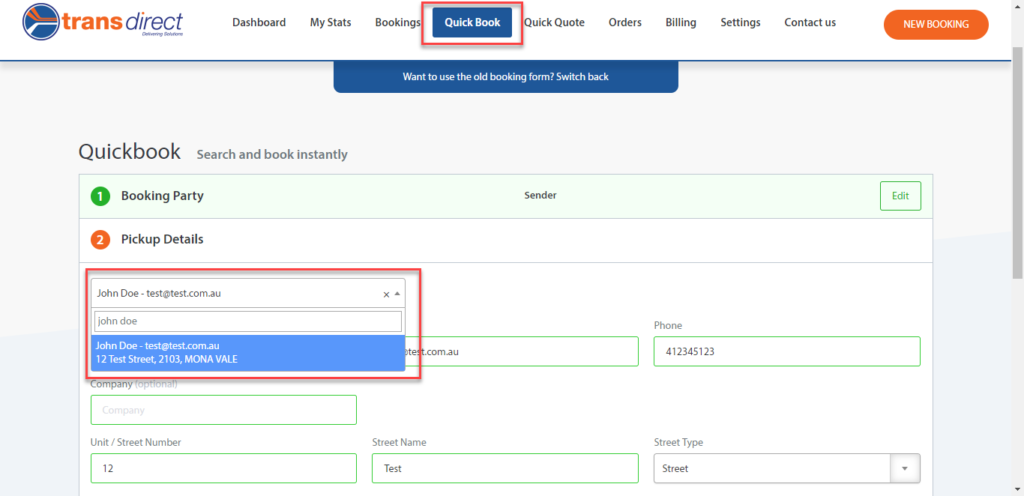
8. To make a booking with your saved data, select “Quick Book” from the menu. You’ll notice your “Sender” details and “Pickup” details are pre-selected.

9. Under “Delivery”, you can select the reference you entered earlier e.g. “DOE”. Using the reference, you will be able to pre-select delivery information. Then click “Continue”.
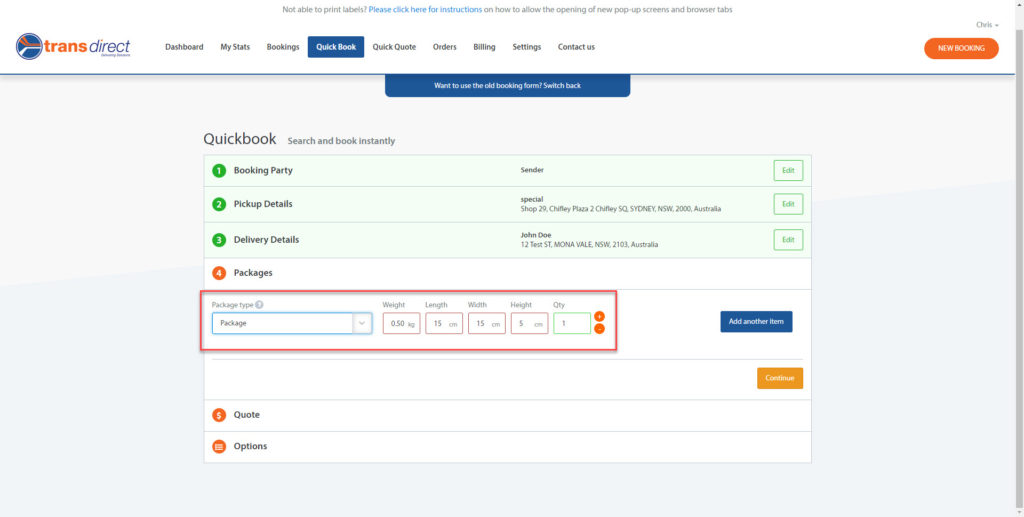
10. Next you’ll need to choose the package type. Using “add another item” you can pre-select commonly used inventory items and package types. Click “Continue” once you’ve added all the items you need to send.
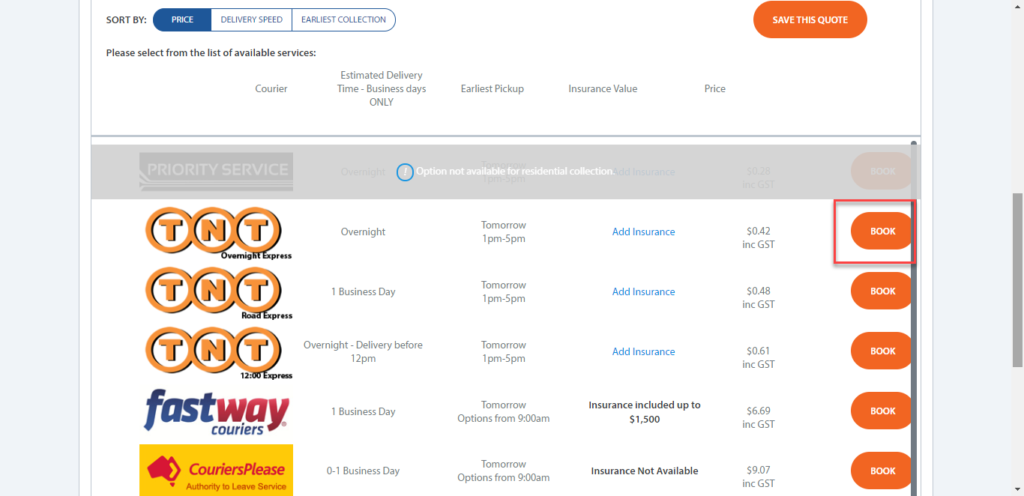
11. You will then need to select a courier. Find your preferred courier, delivery type or fee, then click “Book”.
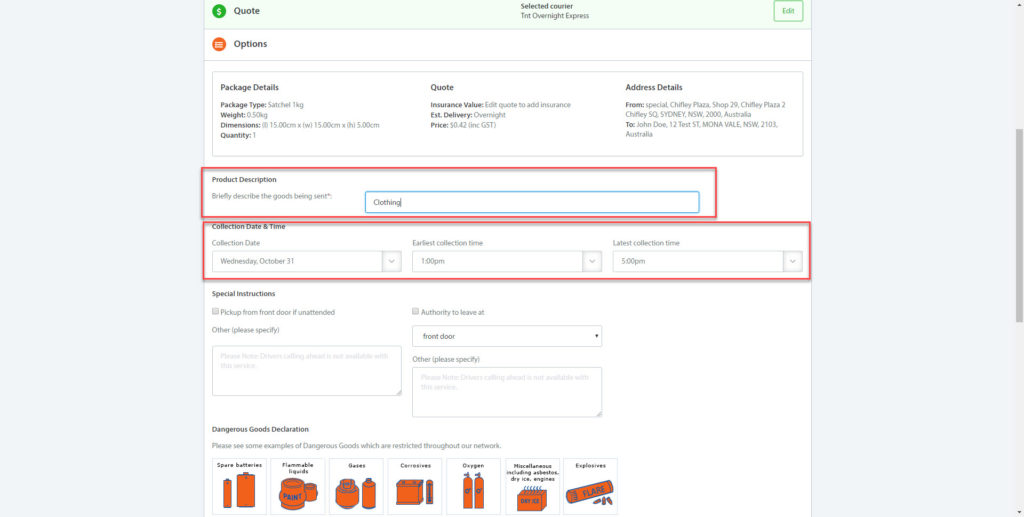
12. You will need to leave a description of the contents of the parcel. You can then add a collection date and time.
13. You can leave special instructions if need be, click “Book”.
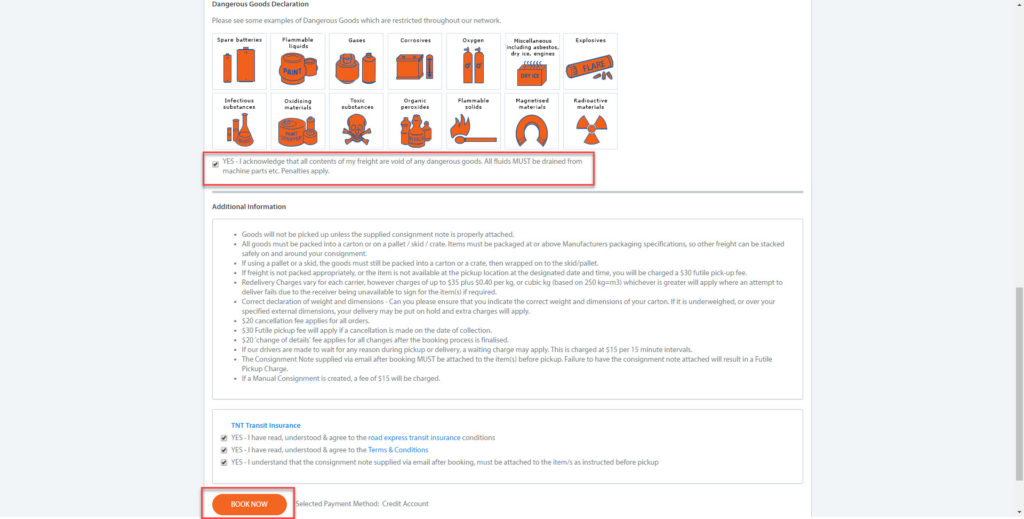
14. The order will then be placed and you can print labels from “Booking”. The labels will also be sent to your email.
