How to sell (your brand and products) on Facebook
Love it or hate it, you can’t deny that Facebook has become a world-wide phenomenon. More than 2 billion people actively use the platform every month, and more ecommerce brands are turning to Facebook to tap into this market. Whether you’re running an ecommerce startup or an established brand, it’s easy to learn how to sell on Facebook. Just follow these four simple steps…
Step 1: Create a business page

Before you can start selling on Facebook, you’ll need to set up a dedicated Facebook page for your business. This is different to your personal Facebook account.
- Go to ‘Create a Page’, then select the type of business from the list provided.
- Next, you’ll need to give Facebook some further detail — like the name of your business, your address and the page category that is relevant to your business.
- Then it’s time to populate your business page:
- Upload a profile image (could be your logo) and a cover photo
- Write a short description of your business
- Complete the rest of the ‘about’ section
Now you’re ready to get busy posting!
Step 2: Choose your platform
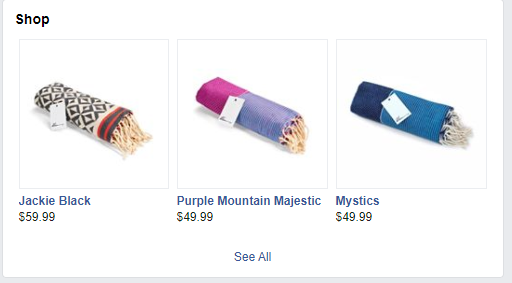
There are two options when it comes to managing your Facebook Shop. You can choose to upload and manage products on your Facebook Shop manually, or you can connect to an eCommerce platform like Shopify.
So how do you decide? If you’re at the beginning of your eCommerce journey and don’t have an eCommerce platform already set up, then managing your Facebook Shop manually is probably the easiest option for you. Likewise, if your Facebook Shop is to be your only sales channel, then it’s probably best to stick to manual management.
However, if you are already set up on Shopify or a similar eCommerce platform, and sell via multiple channels, you’ll want to connect your compatible platform to your Facebook Shop. This will save you considerable time as you’ll be able to upload, edit and manage product lists on your central eCommerce platform which will then automatically upload and update your content to all your sales channels — including your Facebook Shop.
Step 3: Post your products
Whether you’re uploading product listings directly to your Facebook Shop or using an eCommerce platform, there are some rules for creating effective product listings that apply to both methods.
For starters, don’t skimp on your product photos. A professional photographer will give you the best results, but if you can’t afford that, be sure to use a quality camera with good lighting and take photos from multiple angles. Also write detailed product descriptions that strike a balance between ‘selling’ the product and giving the customer detailed information. Also include accurate shipping information and give customers easy access to your returns policy.


Step 4: Spread the word
Your products are not going to sell themselves — you’ve got to spread the word about your new Facebook Shop. Fortunately, Facebook makes marketing your wares on the platform quite simple and affordable.
You can easily select single products — or collections of similar products — to promote via paid posts and ads. Boosted posts will help you reach more people beyond your immediate followers (for a fee), and you can also run paid ad campaigns with budget limits set to ensure you don’t overspend.
There are also free ways to market your products. It’s all about creating shareable content that your followers are likely to distribute to their networks. Contests and giveaway offers are always popular, but don’t be afraid to experiment with funny memes or creative video content that people will want to share.

Facebook is a fantastic way to gain new customers and grow your business – but you need to make sure you take care of your customers once they’ve entered in their precious card details.
Work with Transdirect to get your products from A to B in a flash!
Ready to start shipping? New customers get a quote, or existing members please sign in.